Some times we develop Android on a remote Linux machine (or WSL). We need to use adb in remote machine and connect to the local Android device.
Android Debug Bridge (adb) | Android Studio | Android Developers
Just to be more clear:
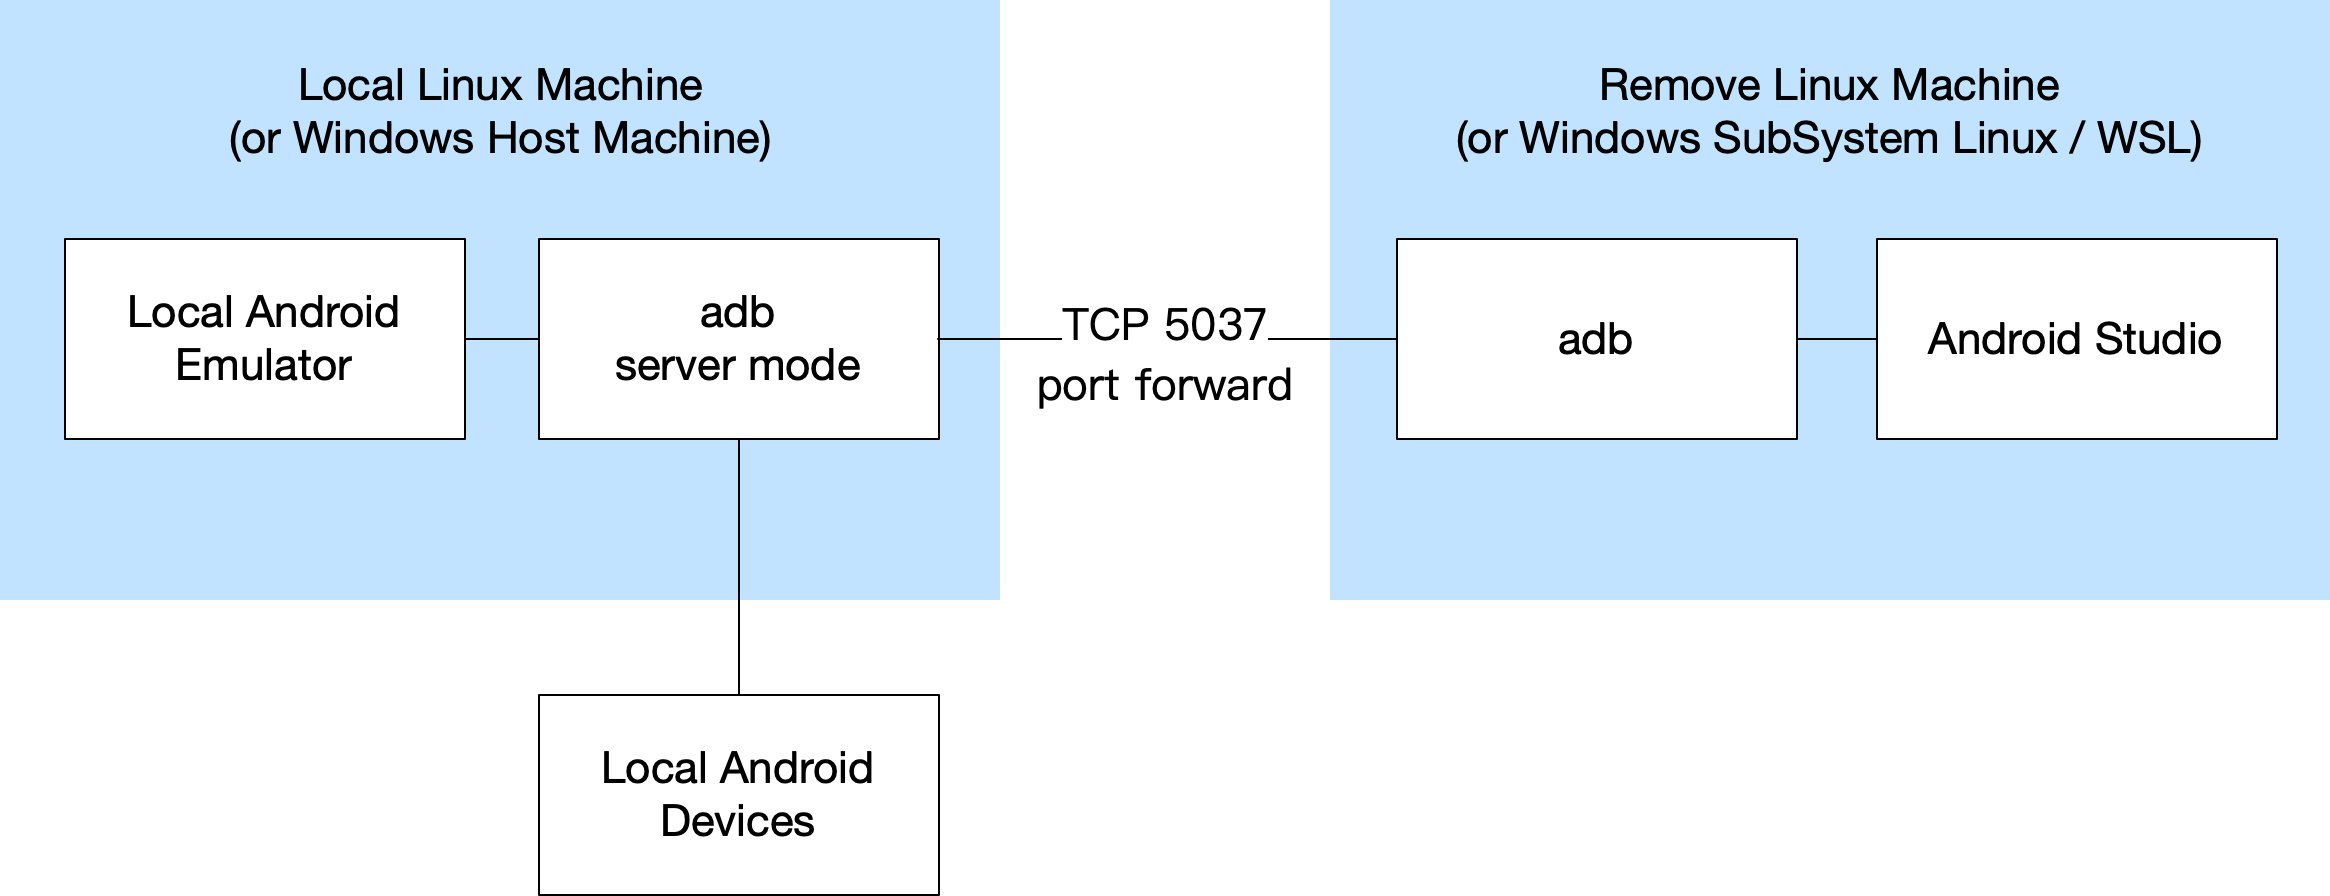
- The “local machine” means the machine you are using directly and you will also connect the Android device to the “local machine” directly through USB. It can be Windows host machine with a WSL inside it, it can also be a Linux / Mac.
- The “remote machine” means the Linux machine you store the project code and use it to build and debug. Normally it is WSL (Ubuntu) or a remote Ubuntu machine. This machine can not connect the Android device directly, so that is why we need to do the whole stuff in this doc.
Here is how we can achieve this:
- Connect physical devices to / run emulators on local machine.
- Run adb in nodaemon server mode on local machine.
- Create a TCP port forwarding from local machine to remove machine using socat (or ssh).
- Use adb in remote to connect local devices.

Prepare the Environment
Install ADB Using Android Studio
Install ADB on both local and remote machine.
ADB is included in the Android SDK platform tools. It is recommended to install Android Studio directly and it will help you download Android SDK:
- Install latest Android Studio on both local and remote machine.
- Start Android Studio and follow the guide, the Android SDK will be automatically downloaded and installed.
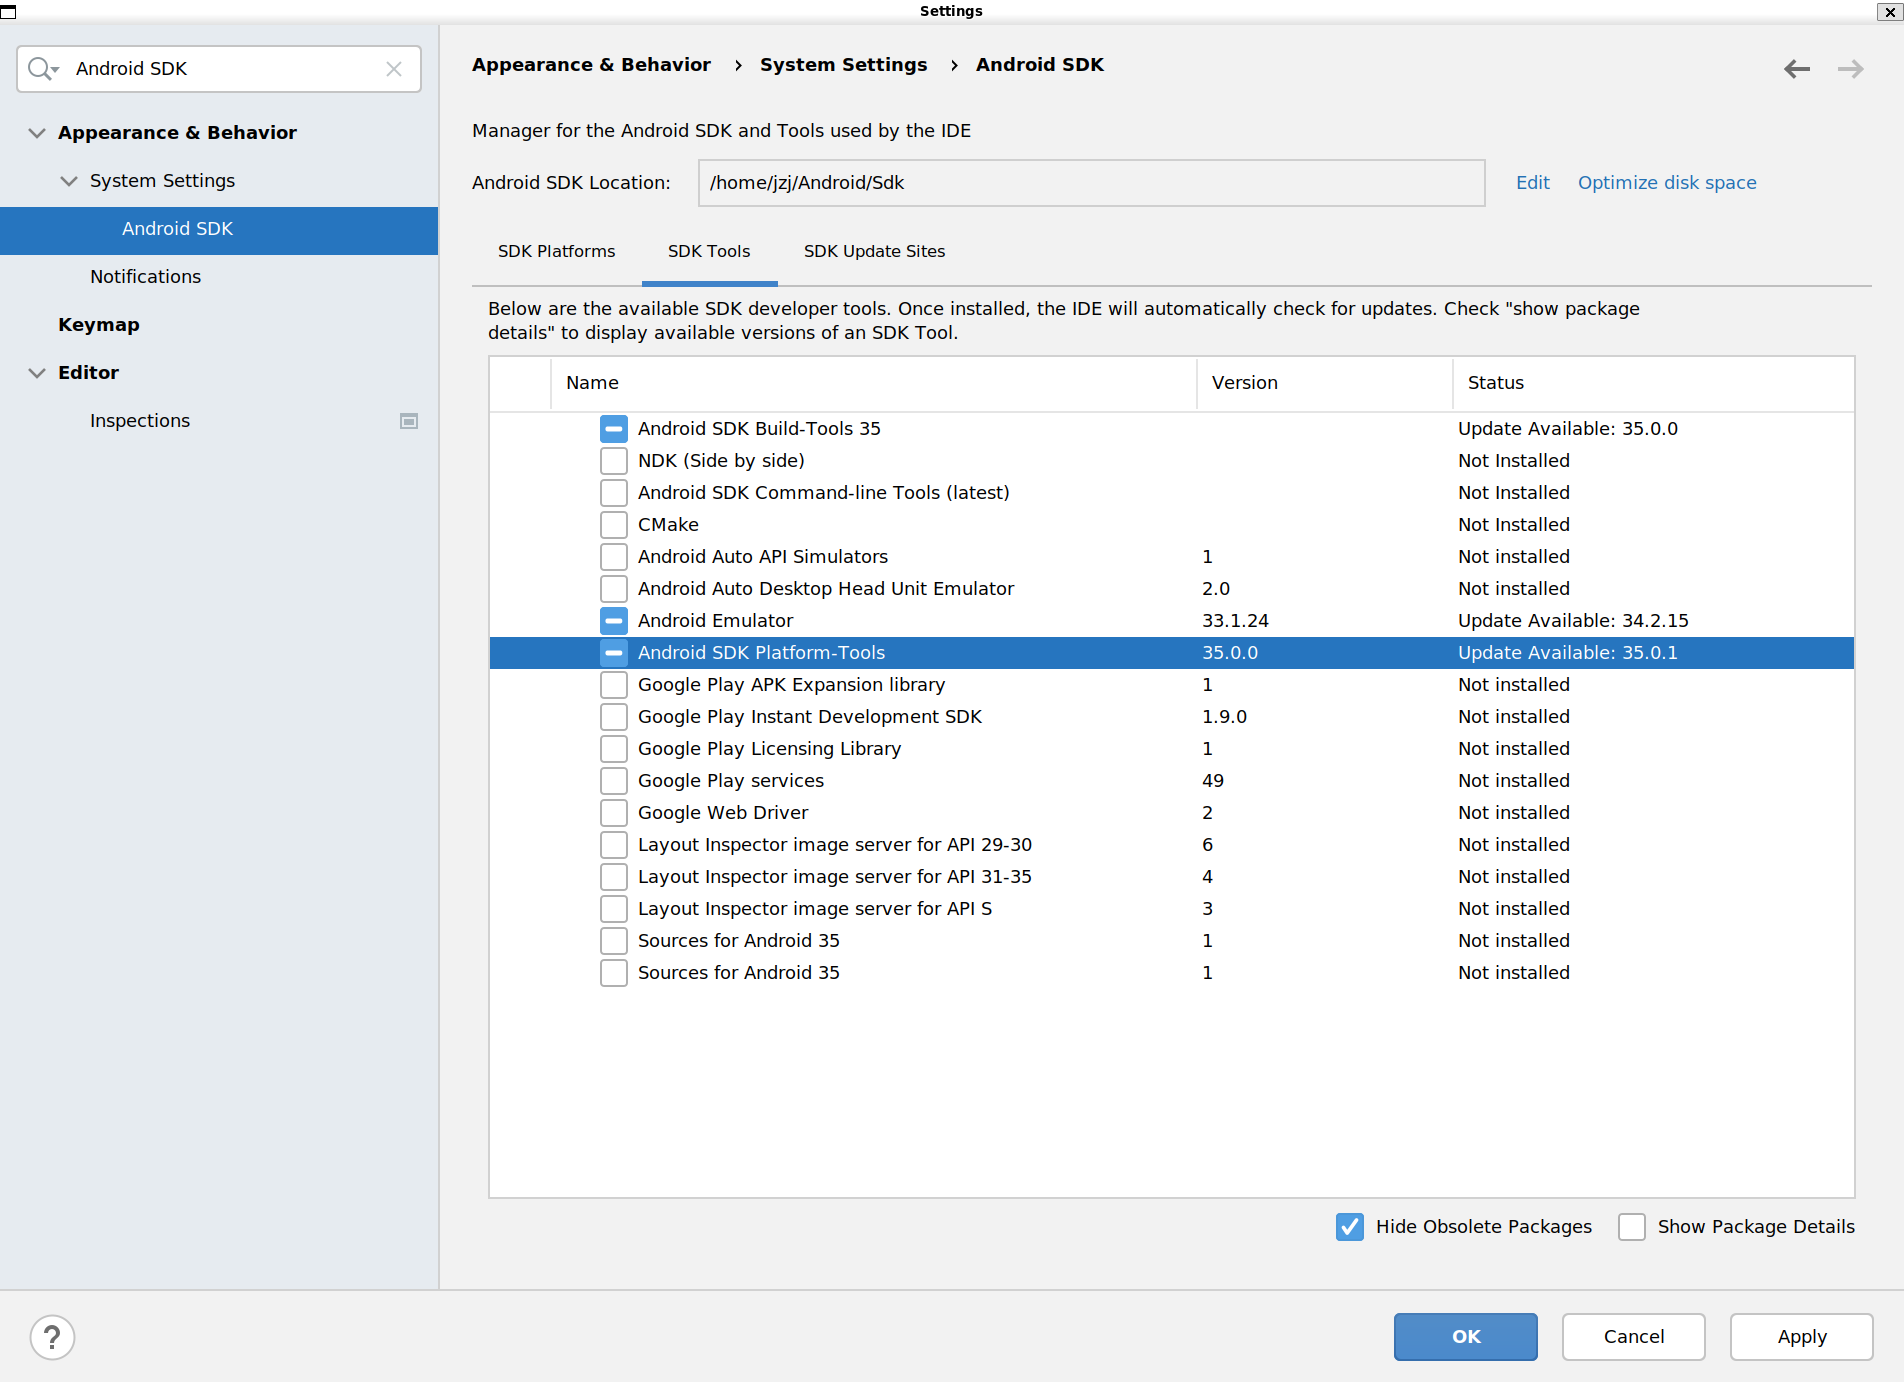
- Search “Android SDK” in the settings to see the Android SDK Location and the Platform-Tools (including adb) version. Make sure the version in both local and remote are the same.
- Add platform-tools directory to your PATH environment. e.g.
/home/jzj/Android/Sdk/platform-tools.

Install ADB Manually
If you wants to download and install ADB manually, please make sure:
- ADB in local machine and remote machine are the same version.
- On remote machine, ADB in command line and Android Studio are the same one.
Download platform tools only from here:
SDK Platform Tools release notes | Android Studio | Android Developers
Check adb version in command line:
1 | # show adb path |
(Windows Only) Configure Firewall for ADB
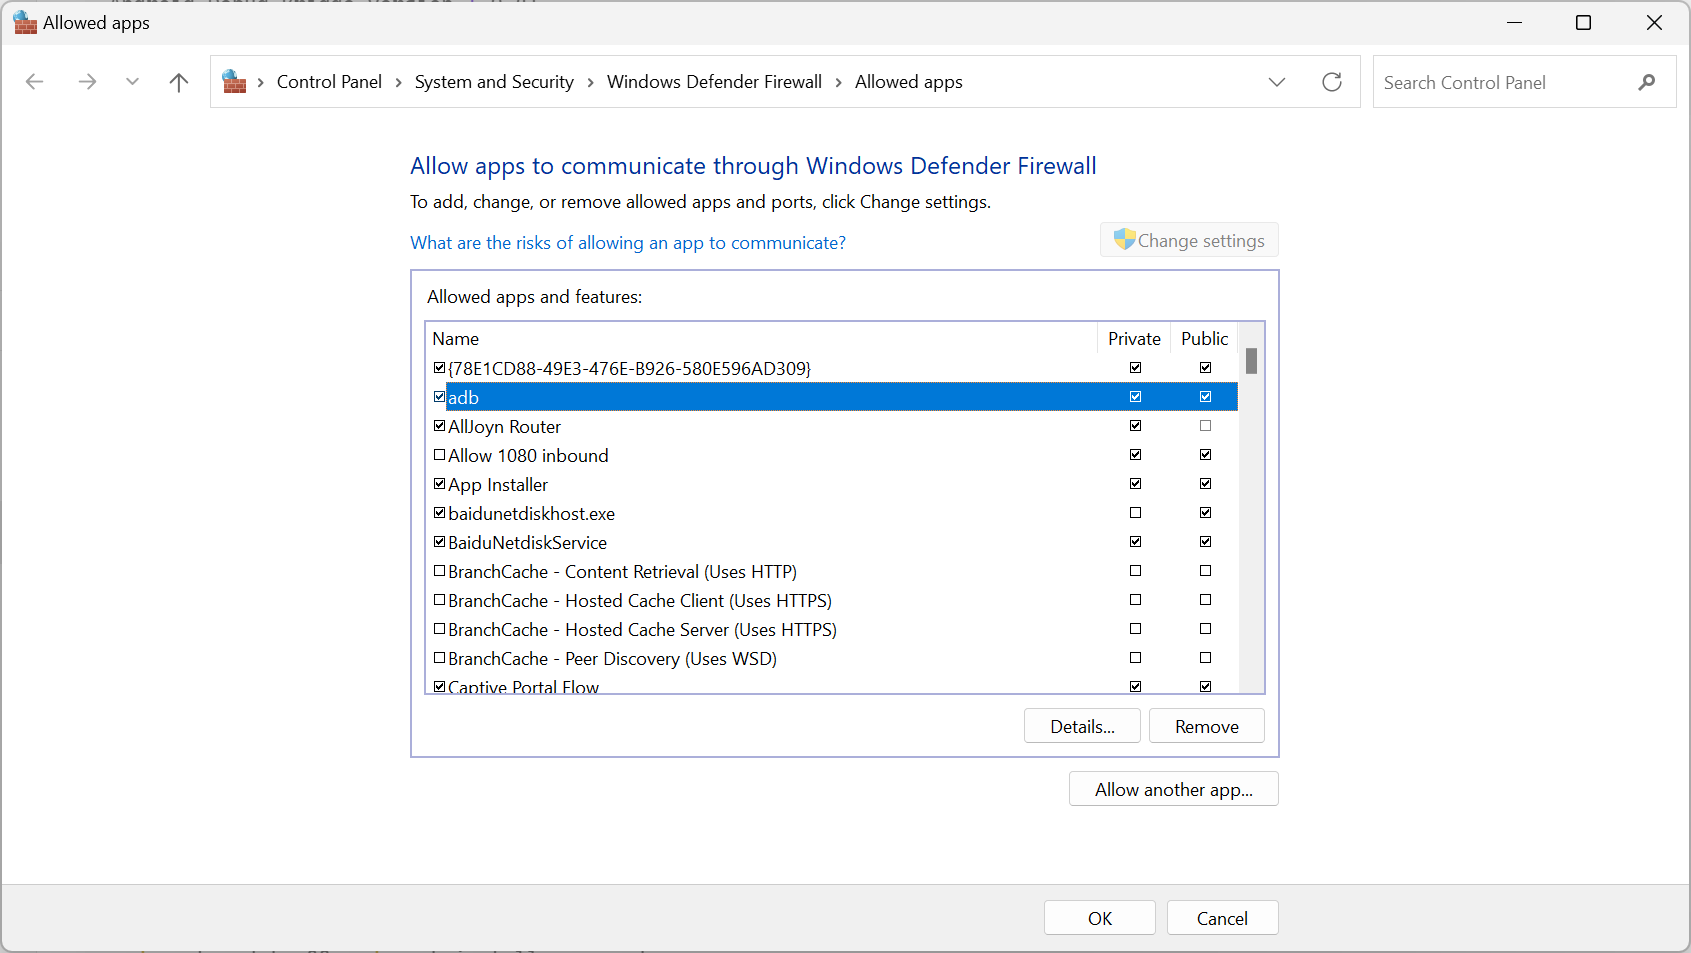
On Windows, we need to enable ADB network access in firewall settings.

3. (WSL Only) Install socat
For WSL, install socat first. It is used to do the port forwarding.
1 | sudo apt update && sudo apt install -y socat |
Start the Environment Automatically for WSL
We have a script to start the adb environment automatically. If it is not working, try to run it step by step to see what is going wrong.
Usage:
- Install adb on Windows and change
$WSL_HOST_ADBto the adb location following the example format. In WSL,/mnt/dis point to theD:drive in Windows. - Install adb on WSL. Make sure you are using the same adb in terminal and Android Studio. And make sure you installed the same version of adb in Windows and WSL.
- Add the following content to your WSL
~/.bashrcand runsource ~/.bashrcto refresh. - Run
startWslAdb/stopWslAdbto start/stop adb environment.
1 | # adb path on windows |
Start the Environment Automatically for Remote Linux Machine
Usage
- Setup ssh key for remote machine.
- Install adb on local machine.
- Install adb on remote machine and change
REMOTE_ADB_PATHvalue to the adb location. Make sure you are using the same adb in terminal and Android Studio. And make sure you installed the same version of adb in local and remote machine. - Add the following content to your local
~/.bashrcand runsource ~/.bashrcto refresh. - Run
startRemoteAdb USER HOST/stopRemoteAdb USER HOSTto start/stop adb environment.
1 | REMOTE_ADB_PATH='$HOME/Android/Sdk/platform-tools/adb' |
Troubleshooting
Check Installed ADB
- Please make sure the WSL Windows host machine (or local Linux machine) and the WSL (or remote Linux machine) are using the same version of adb. Otherwise they may not be able to connect and work together.
- Please make sure the adb in the command line and the adb used by Android Studio in WSL (or remote Linux machine) is the same executable file. Otherwise Android Studio will try to start the adb which the command line already starts another adb which will cause a conflict.
Restart Your Machine
Try to restart your machine may also help. Adb will start a server, sometimes the TCP port may be occupied for some reason, so restarting the machine may help.
Run The Script Step by Step
Try to run the automatic script step by step to see what is going wrong.
Adb Forwarding Stop Works Every Time Android Studio Exits
If your adb forwarding stop works every time Android Studio exits, you should:
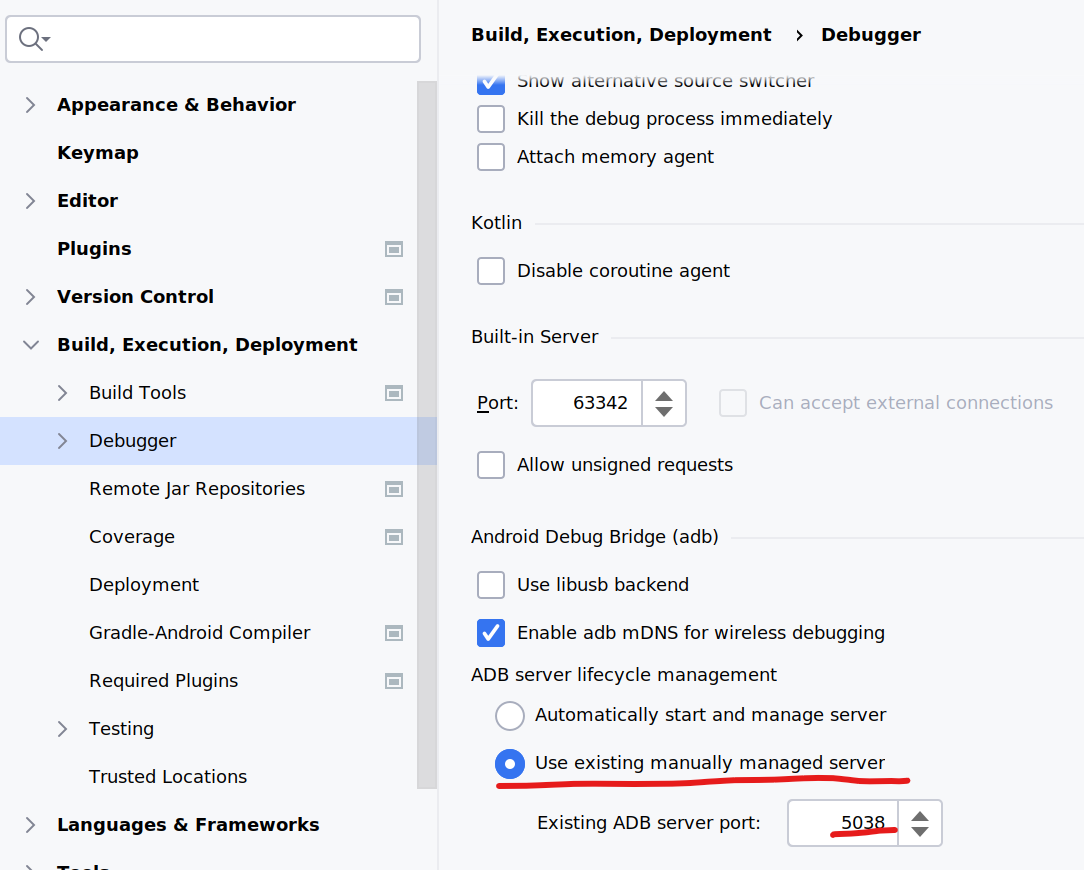
- Change Android Studio settings to use existing adb server
- Use environment variable to set the adb port in remote machine to the same value in Android Studio (in the screenshot the value is 5038)
- Change the corresponding port in the script.
1 | # this should be added to the "remote machine" |

ADB Install APK is Very Slow In WSL
If ADB install APK is very slow in WSL, try running this in Windows Power Shell with administrator permission:
1 | # run this to get all the network adapters, find the name of the virtual adapter for WSL, the name will be like `vEthernet (WSL)` or `vEthernet (WSL (Hyper-V firewall))` |
Very slow network speeds · Issue #8171 · microsoft/WSL · GitHub
Get-NetAdapter (NetAdapter) | Microsoft Learn